|
|||||||
| 2004 to 2008 F-150 and Mark-LT 4.2L, 4.6L and 5.4L equipped F-150s and Mark-LTs |
 |
|
|
Thread Tools | Display Modes |
|
|
|
#1
 Mon, January 26th, 2009, 10:23 PM
|
||||
|
||||
|
OK - I've been reading about this approach to a CAI mod long enough that I decided to try it. Here's what I did - and I take no credit at all for any of this, it was just my implementation of the excellent ideas put out by people that came before me.
In the 2004-2008 trucks, the intake snorkel has only a 2" diameter at the end where it goes into the fender well. Other than that, it's a Cold Air Intake - so, the goal is to increase the intake opening. We start with the intake ducting. Remove the holddown bolt (red circle) in the picture below and pull the snorkel out of the fender wall (red arrow). Once you do that, you can pull the duct away from the filter box. It will make a lot of noise that sounds like something is breaking - just smile and ignore the bad sounds.  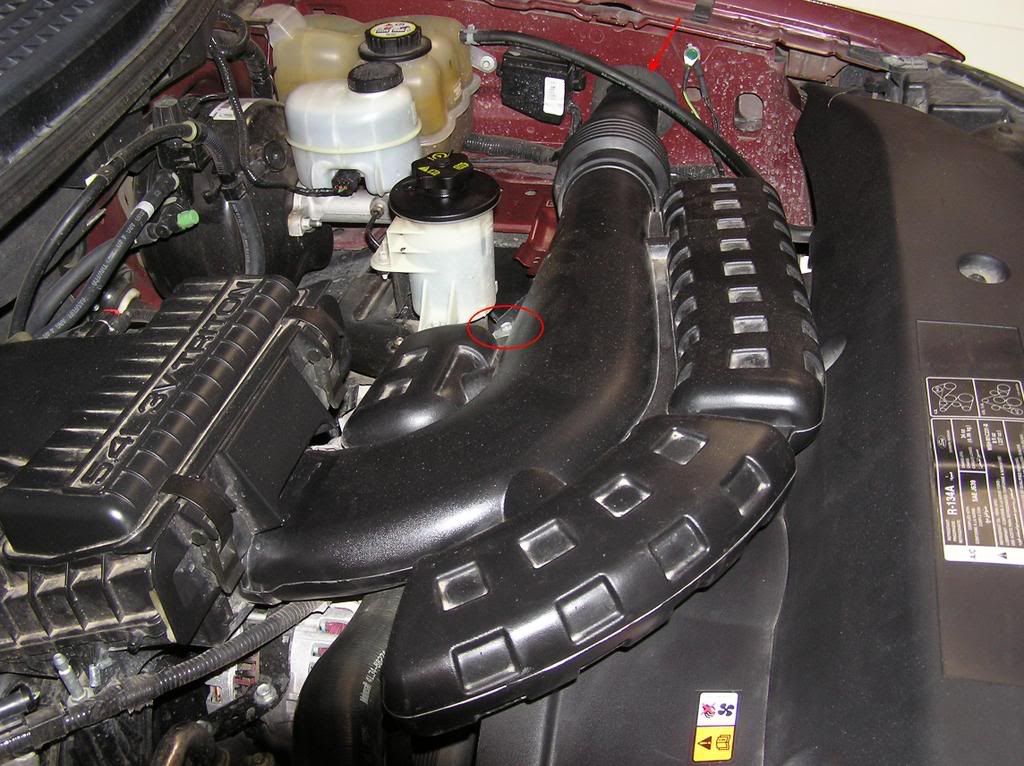 Now that you've got the intake duct out, turn it over and you'll see two rectangular "bumps" at each end of the bellows that look like they might be "release tabs". They aren't! Instead, they sit over raised areas on the inside tube that act sort of like "tire irons" to separate the bellows from the other parts of the ducting. I separated the bellows from the duct using the circled "bump" in the picture below. (Notice I like to work on the tailgate of my truck). :o 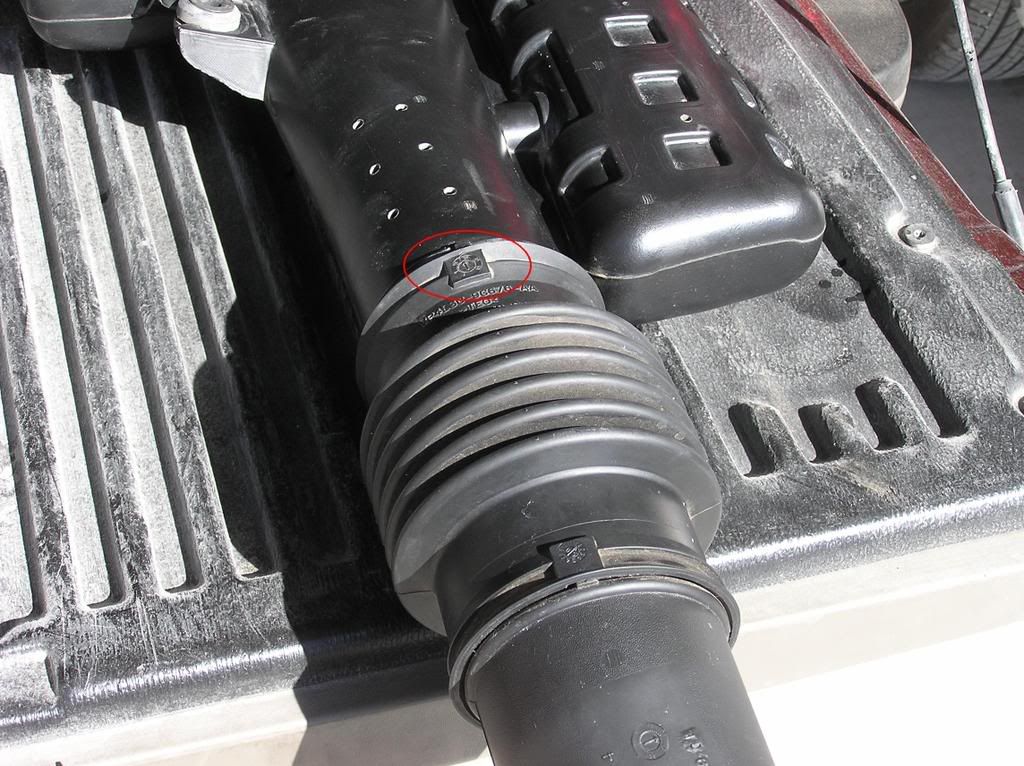 To do this, I put the duct between my knees and then twisted the base of the bellows (where I'm holding it with one hand) all the way around, and it comes right off. (I had to use two hands to do this, but in the picture, one hand was holding the camera). 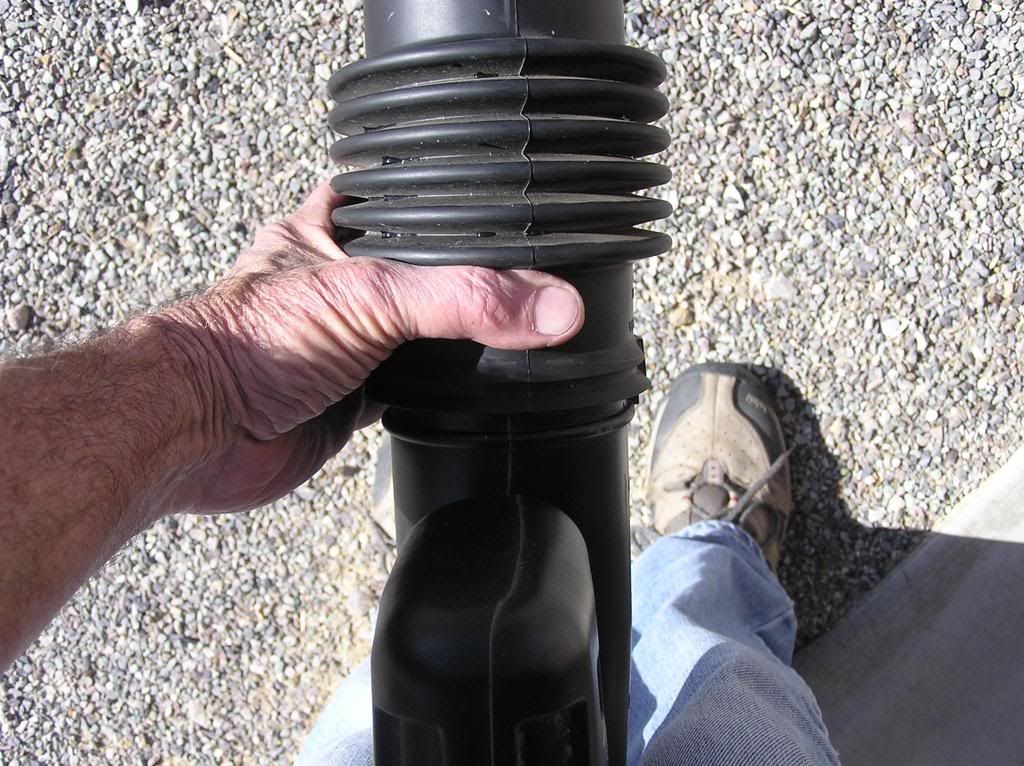 Now that it's off, you can see the duct opening, which is 3" wide here and the little square bump at the top that was the "tire iron". 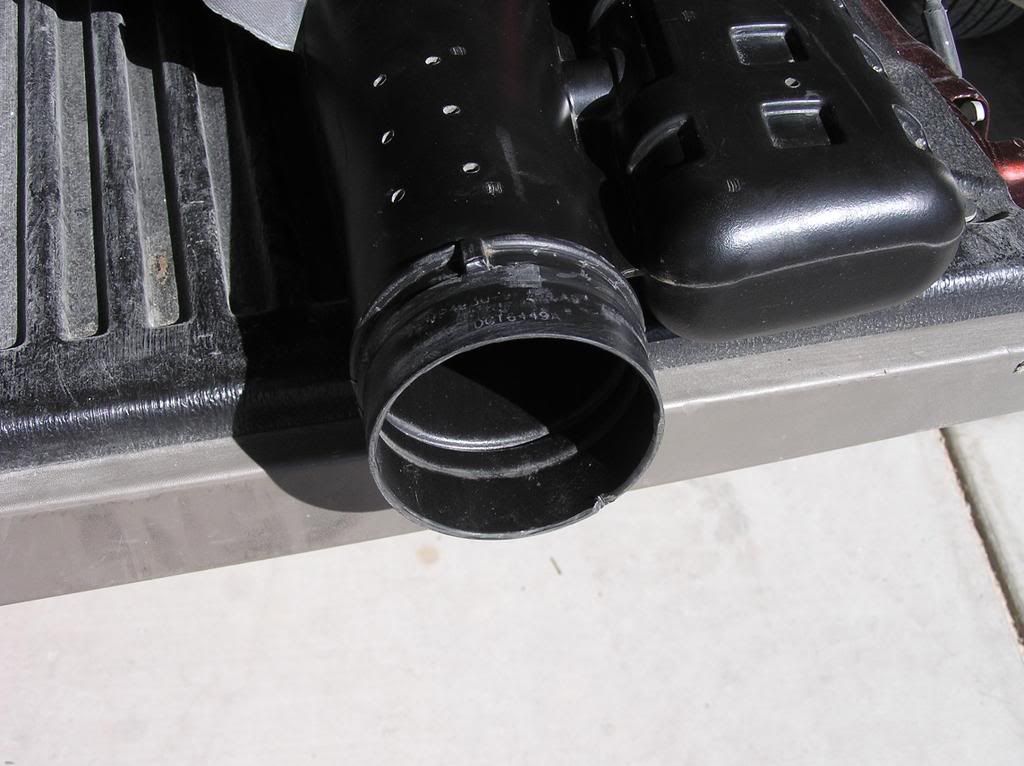 Compare the 2" flared opening of the snorkel that fits inside the fender with the 3" opening of the duct upstream of the bellows and you see why the engine might have trouble getting enough air at WOT. 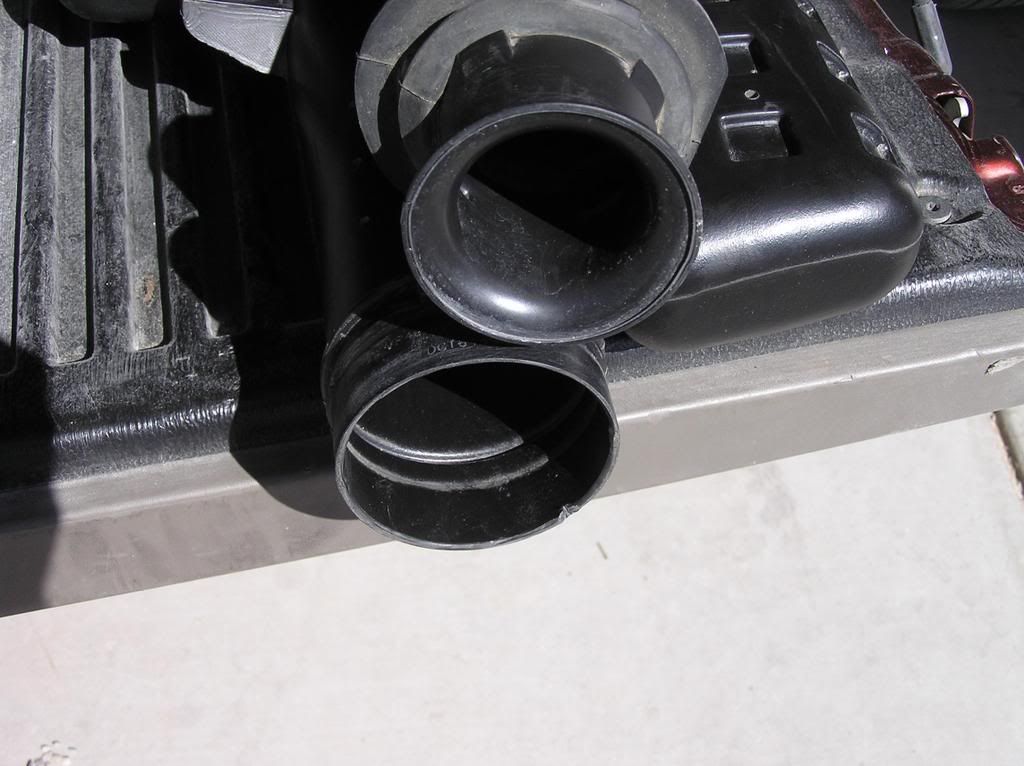 I went to Home Depot and bought a 2 ft length of 3" ABS pipe and a 3" to 3" rubber coupler. I wanted to make sure my new duct went into the fender as far as the original snorkel, so I marked my new 3" tube with a white line to match the gasket position. 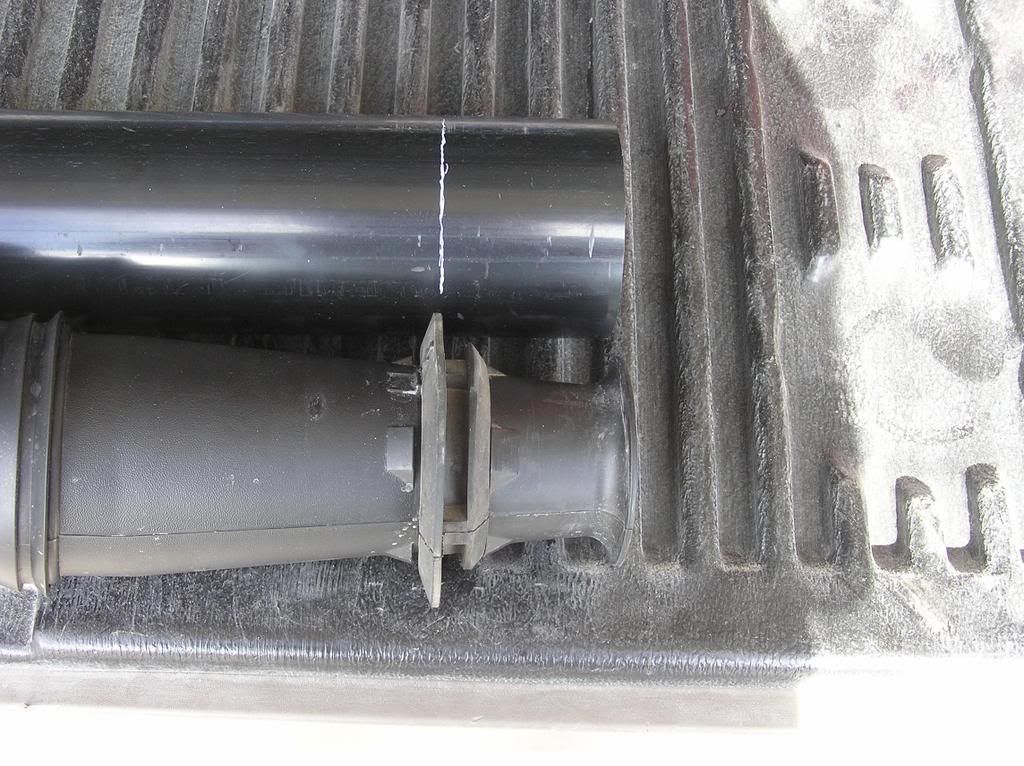 Now we have a complication. The hole in the fender is an oval, about 3 1/8" high by 3 1/2" wide. There's actually a small "lip" inside this oval too and I got rid of that lip with a Dremel grinding wheel. The resultant hole is now closer to 3 1/4" high and 3 1/2" wide. (Ignore the dirty fender wall). :o 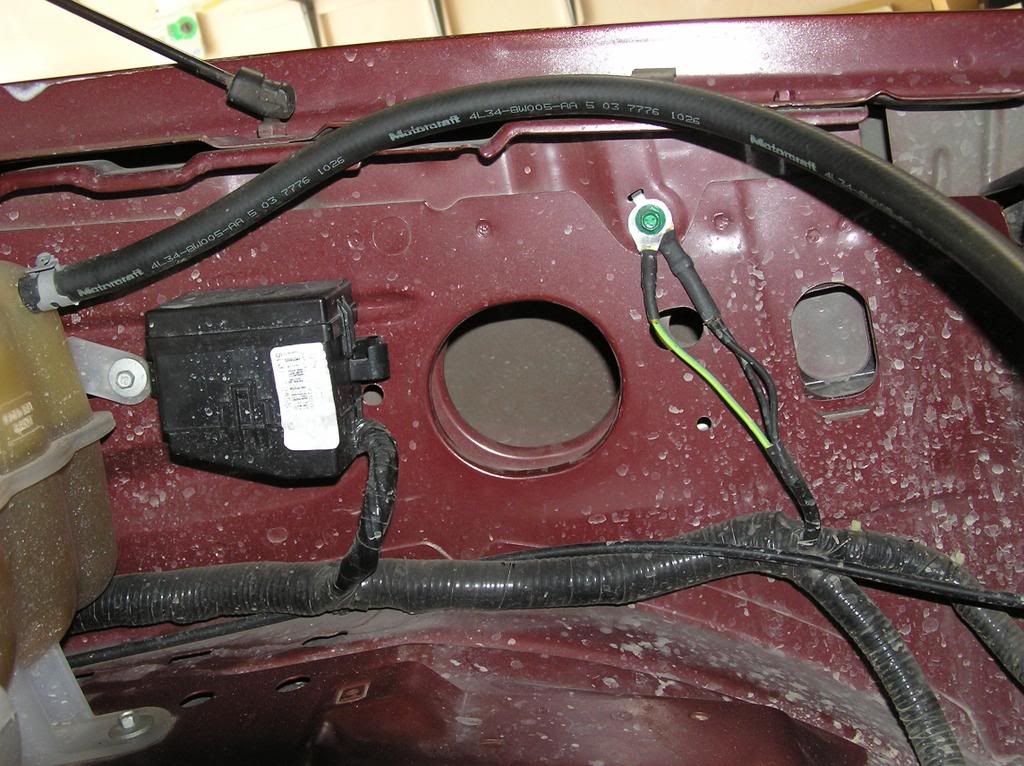 The hardest part: I had to reshape the end of my new snorkel tube back to the white line to match the 3 1/4 x 3 1/2 oval opening. I used a "Mouse" sander, pictured here with the end of the tube that I shaped. 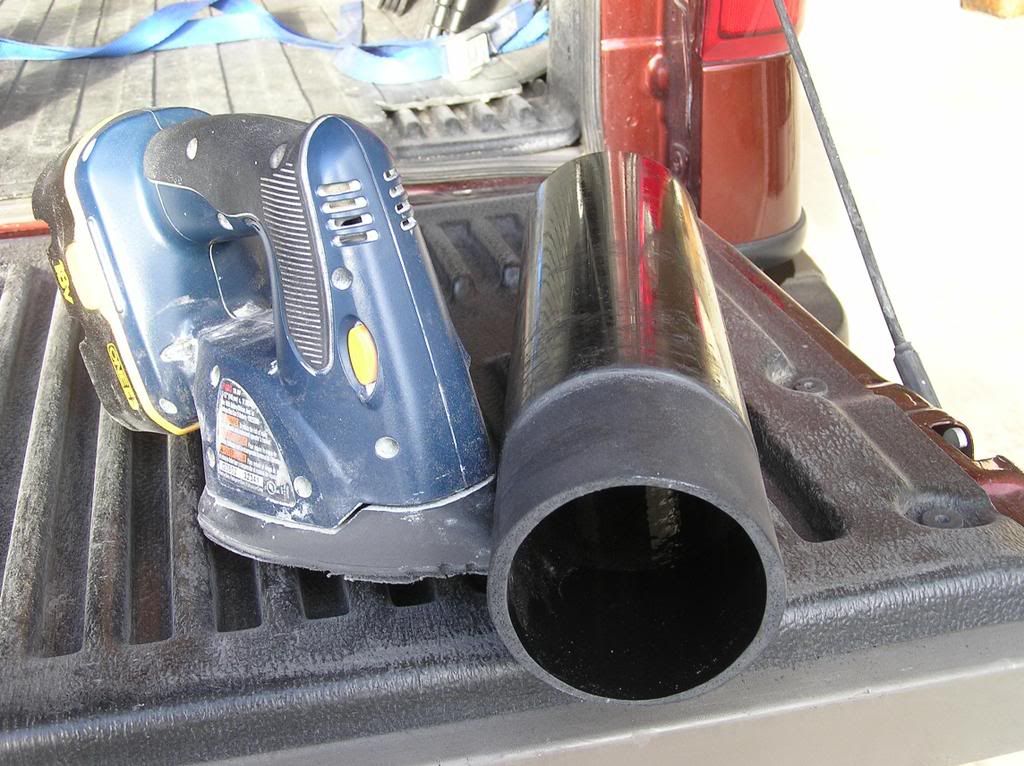 Here's the finished tube, looking straight down the intake end. The outer surface is cut down so it will just fit into the fender opening. The inside opening is a true 3" intake. 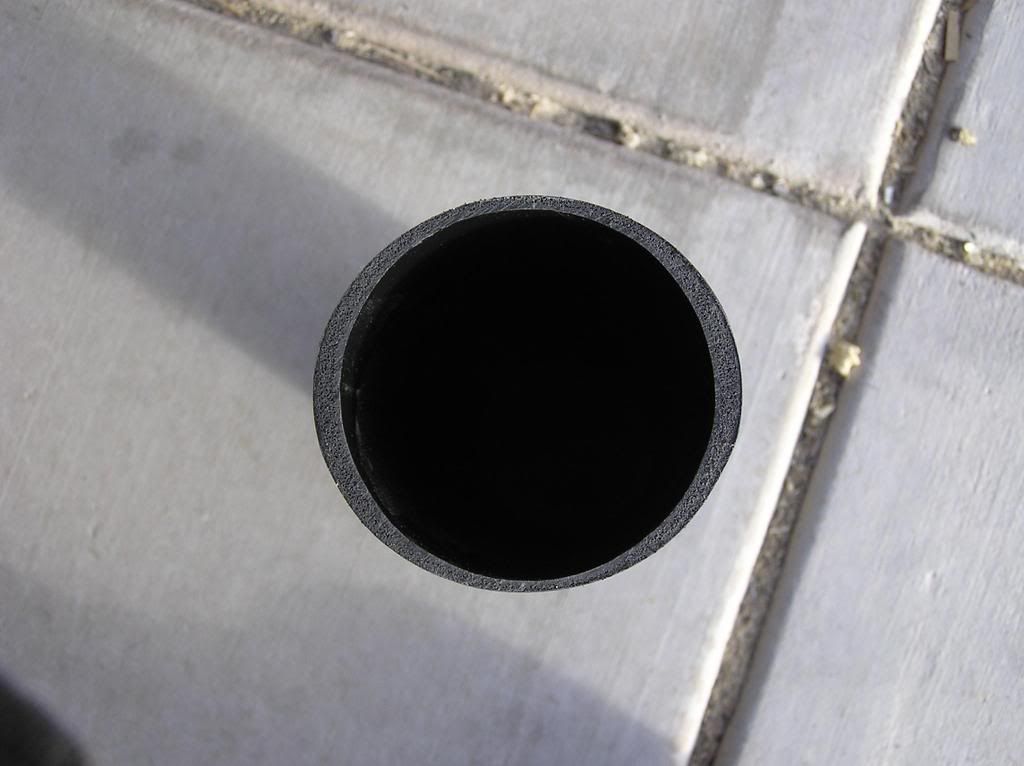 The new snorkel tube will have to be angled slightly from the rest of the intake to fit into the fender properly. (It needs to enter the fender at close to a right angle), so, the other end of the tube was cut at an angle try to match the truck's tube opening angle. The length of the new snorkel on the long side is 12 1/2 ". The length of the short side is 12". 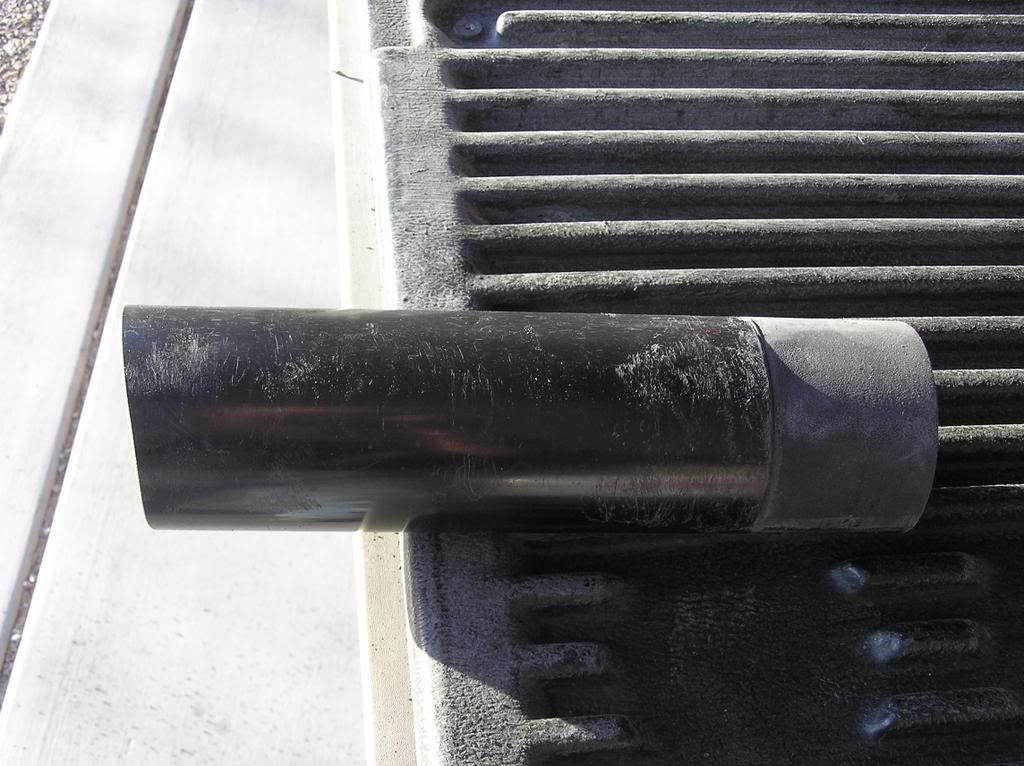 Here, I've joined the two pieces with a 3" to 3" rubber coupler. Leave the "hose clamps" loose for now. 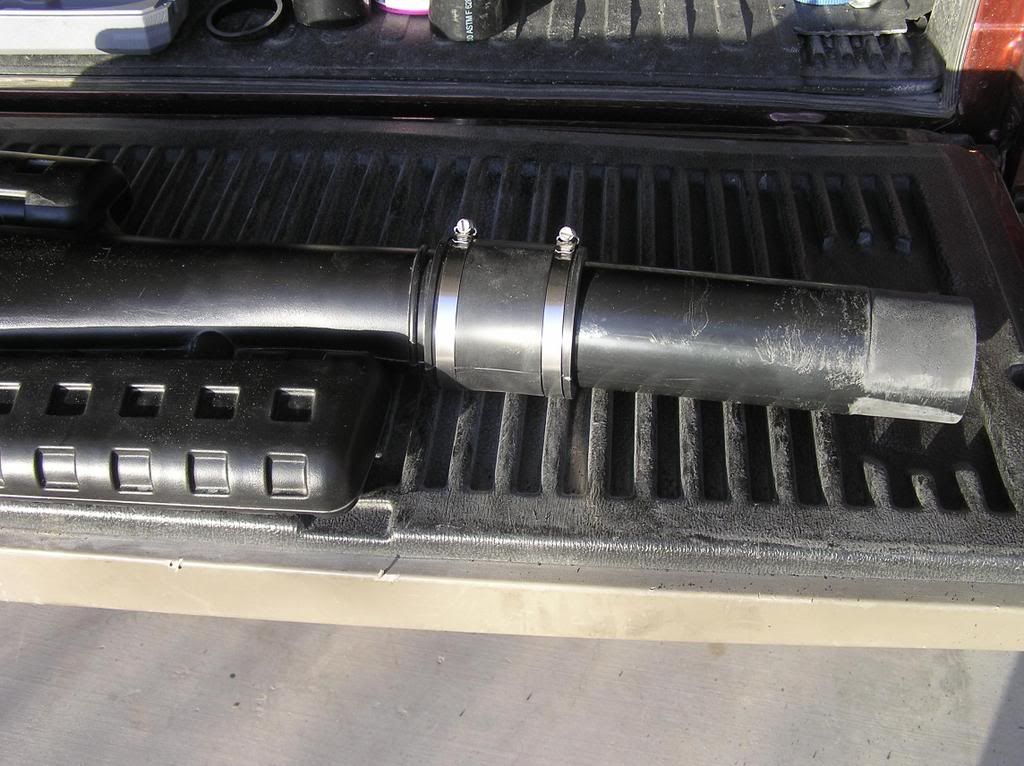 I put my new snorkel into the fender (at a right angle) and it goes in right up to the line where I stopped shaping it. It's actually through the second hole in the inside of the fender at this point. It fits quite tightly through the opening, so I'm not worried about it getting "warm" engine air. 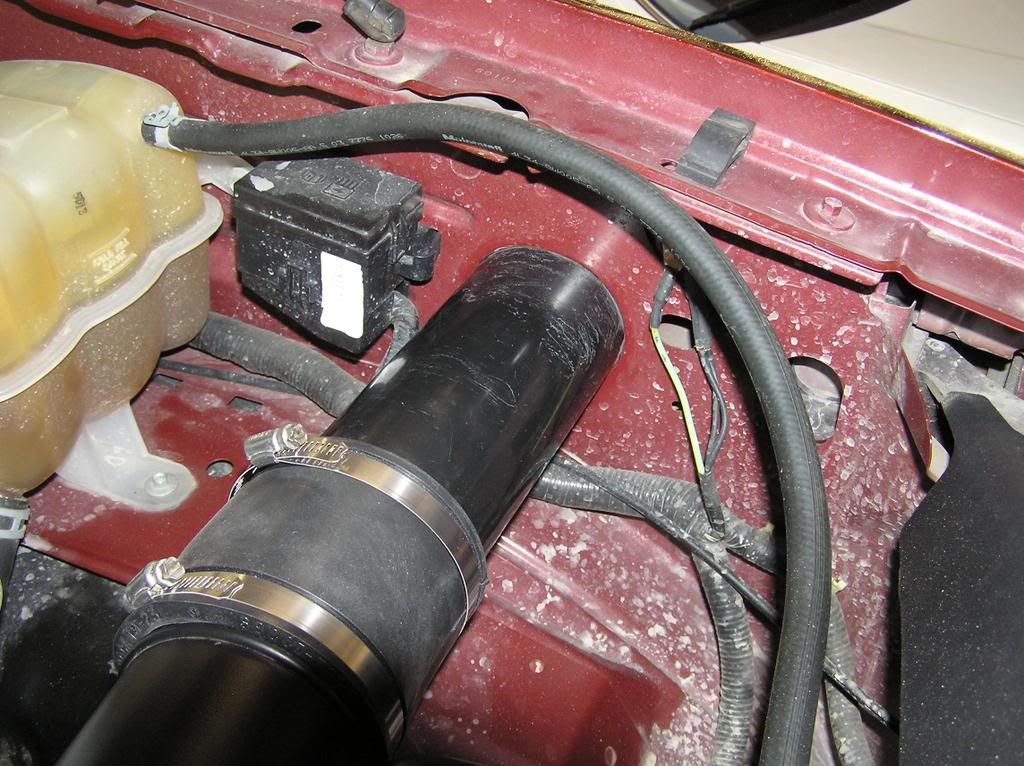 Next, I reinserted the stock intake into the filter box opening and reinserted the hold down bolt. This pulled the new snorkel out of the fender a bit.  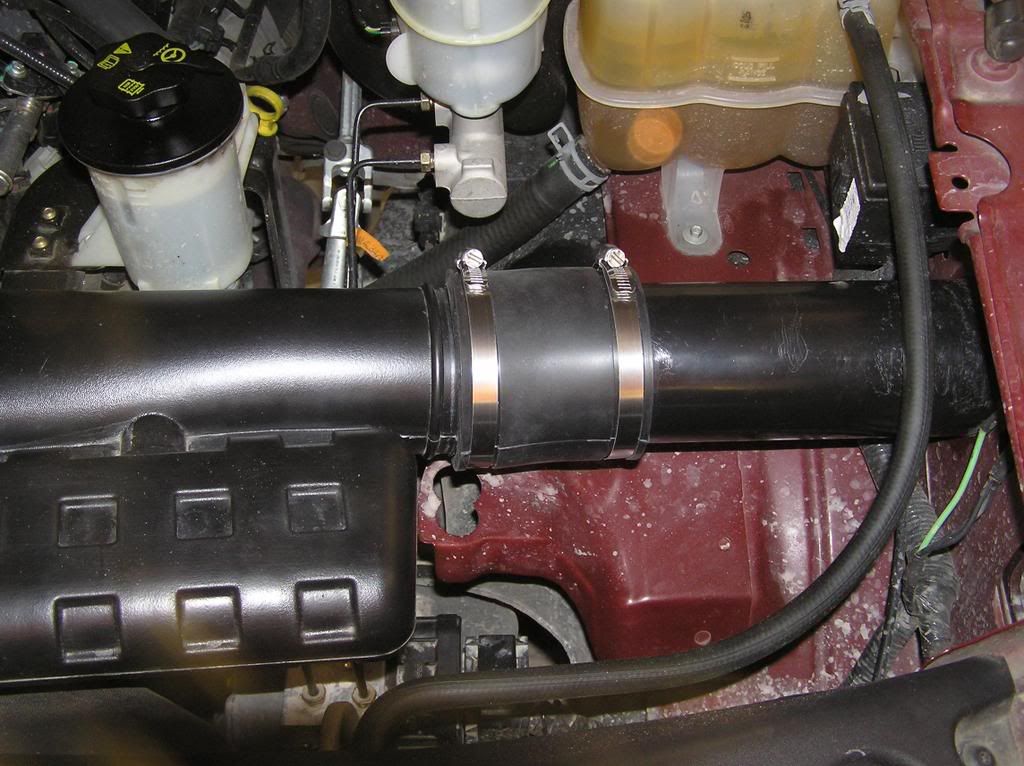 I worked with the snorkel to redirect it back into the opening as far as possible. It's not quite perfect, but I think it's good enough. (A "bellows" connector would be ideal here). Once I got the snorkel in place, I tightened the hose clamps. 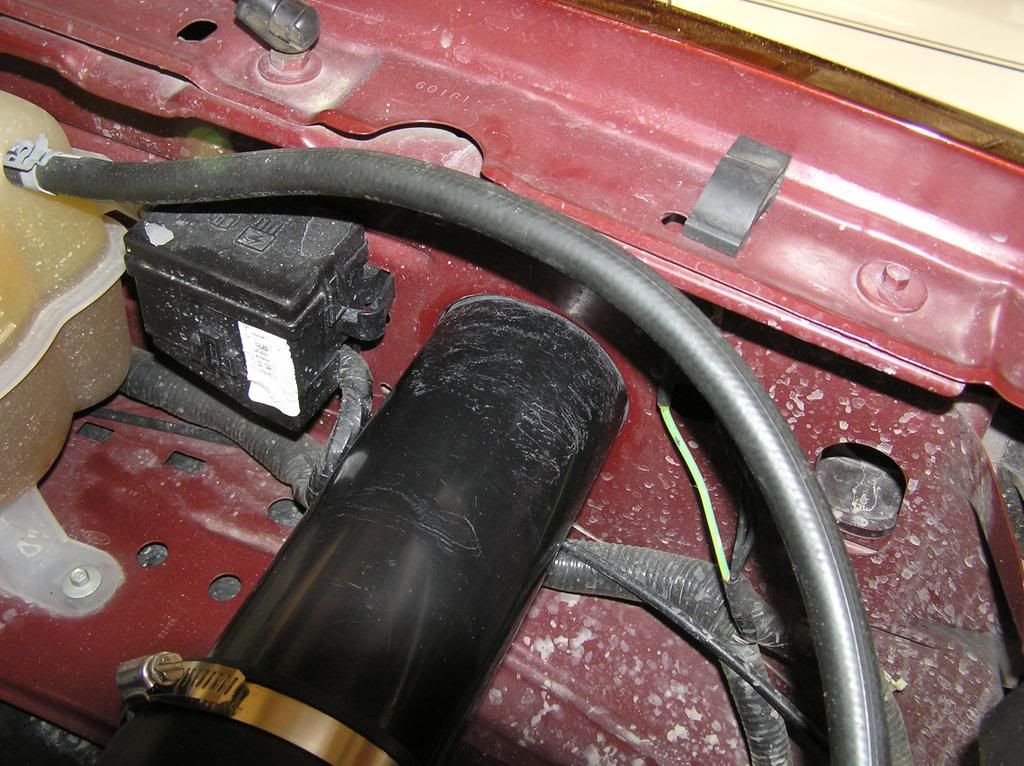 This is the finished assembly. A true 3" CAI for about $13. Best of all, I can return it to stock in just a few minutes if I want to. 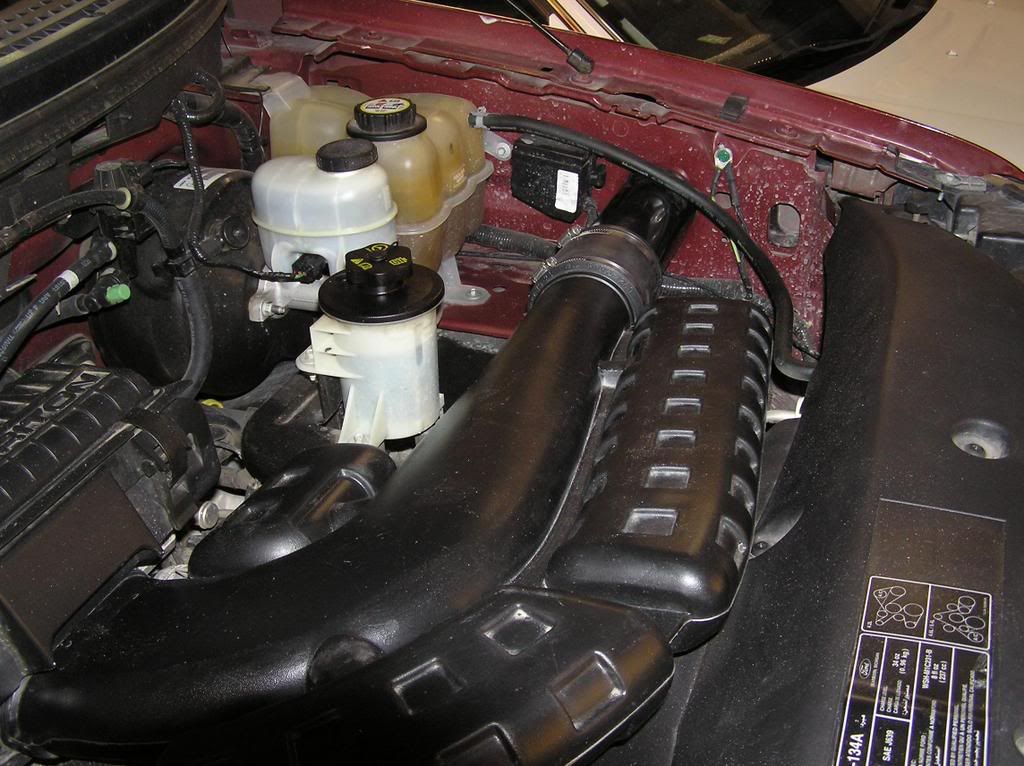 I've disconnected the battery overnight so the PCM will learn a new LTFT strategy and whatever else it has to learn.  So now, Bill: is there any thing wrong with this setup and, I don't need new tunes, right? And please, this was not an attempt to one-up anyone. I have not seen a pictorial for the 2004-2008 models and this is my feeble attempt to put into practice what other, brighter people have been talking about for my model truck. I hope it can be useful. - Jack
__________________
 2014 F150 Platinum SCrew 3.5L EcoBoost 4x4 with SCT programmer 
|
|
#3
Mon, January 26th, 2009, 10:53 PM
|
||||
|
||||
|
Jack,
First off, that was a top-notch post! I give it a 10!  As for the tuning, you should have no problems with your calibrations at all. Since you are not changing anything in relation to the MAF sensor, everything should be perfectly content once the STF and LTF trims relearn. Relearn could take a day or two depending on your driving. For what it's worth, the one I did on the 2006 at Edge looked dead like yours. Again, good job.
__________________
Bill Cohron - The Mad Doctor   Power Hungry Performance - The ORIGINAL in Ford performance tuning... Since 1996! (678) 890-1110 www.gopowerhungry.com - Home of the Hydra Chip, Minotaur Tuning Software, and the new Orion Reflash System for Navistar! Bring back  Windows XP and 7. Windows XP and 7.  Windows Vista and Windows 8 is a pain in my a$$! Windows Vista and Windows 8 is a pain in my a$$!  Windows 10 is only slightly less annoying! Windows 10 is only slightly less annoying!
|
|
#4
Mon, January 26th, 2009, 11:27 PM
|
||||
|
||||
|
Bill and Mark - Thanks bunches!
It just seemed like such a good idea, and I couldn't really find anything in any of the forums for these model years. Please feel free to correct/improve/amplify on anything I've said. I only tried to put into practice what I'd been reading about. I KNOW there has to be things that could have been done better. And, David - please jump in with what you did. I think it may have been for earlier model trucks, which is why I decided to post my work with my 2005. - Jack
|
|
#5
Tue, January 27th, 2009, 01:31 AM
|
|||
|
|||
|
Jack,
I have been searching for this since Bill talked to me about the gott's mod last week (I had some questions about CAI's). I found detailed info for the 03 and older f150's, but I have not found anything with as much detail for the 04-08's as you have presented. Thanks a lot, this info is greatly appreciated it.
|
|
#6
Tue, January 27th, 2009, 06:41 AM
|
|||
|
|||
|
Very nice!
__________________

|
|
#7
Fri, January 30th, 2009, 06:07 AM
|
|||
|
|||
|
Quote:
|
|
#8
Fri, January 30th, 2009, 12:59 PM
|
|||
|
|||
|
I think I may just remove that snorkel and leave everything else the same for now. I have a piece of 3" flexible PVC on order that I plan to run into the fender and re-attach to the stock intake. I'll post pics if it works. I wanted to find something that would work without sanding the hard pvc to fit the fender. I can only imagine how frustrated I'd become spending 3 hours trying to perfectly sand or grind the pvc pipe to fit
. I'll try the flex and let everyone know.
|
|
#9
Fri, January 30th, 2009, 04:47 PM
|
||||
|
||||
|
The DWV intake mod requires no sanding or fitting. I can email you the instructions if you like. Bill is going to post them on here soon. Mark_123 check your PMs.
 EDIT to add: See post #71 in this thread for the DWV intake mod instructions. Last edited by kd4crs; Tue, February 10th, 2009 at 08:51 PM.
|
|
#10
Fri, January 30th, 2009, 06:10 PM
|
||||
|
||||
|
Quote:
- Jack
|
|
| Tags |
| dwv intake mod |
|
|


 Hybrid Mode
