|
|||||||
| 1999 to 2003 7.3L Power Stroke Diesel 7.3L Power Stroke Diesel equipped Super Duty and Excursion |
 |
|
|
Thread Tools | Display Modes |
|
#1
 Sun, March 20th, 2011, 12:11 AM
|
||||
|
||||
|
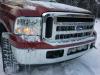
I finally broke down and bought the truck I have been looking at recently. I have worked on the truck a few times for the previous owner so I knew it was in good shape, but still needed a bit of work. It is a dually, which has been growing on me a bit......but I think that it will be getting a SRW soon.
The plan for this truck it to use it to haul my trailer this summer, but after my motor is fixed I will be putting it into this truck and making it my DD. I have yet to decide if I want to make it a short bed yet, still not sure if I like the look of a RCSB.  First day I had the truck I stuck a 6637 filter and my emulator in it and had some fun, it is a pretty light truck and scoots along pretty well. I did however have the classic cylinder #8 injector missing at idle.....so I will cover that swap briefly as I am sure others can learn from it.  First thing to do is to take the air filter assembly off, followed by the inter-cooler pipe, then disconnect the main engine electrical connector.  After that pull the "dog house" breather assembly, then all the valve cover bolts and pull the cover.  Remove the two oil drain plugs locate between the first and last two cylinders. These can be a pain to break loose, but a few strikes with a hammer the the head can help a bunch.  Then loosen the fuel rail plug on the back of the head using a 1/4 drive ratchet and let the fuel drain from the head, sorry a picture would have been impossible to get. Next I removed the rocker arm and push-rod to get a bit of extra room to remove the injector, then pulled the oil spout to prevent any damage. After the rear injector hold down bolt is removed the "hold down" needs to be slid forward to disengage from the front bolt, after a bit of motivation from a pry bar the injector will pop right out.  You can see here the lower o-ring has had enough, so I will plan on changing all the others in the near future.  When re-installing the injector give it a few taps to make sure it is seated with a dead blow hammer, or a rubber mallet. Once it is torqued give it a few more taps, then torque again. Then remove the glowplug - replace oil rail plugs - and tighten the fuel rail plug on the back of the head. Be sure when installing the pushrod that the copper end goes up - towards the rocker arm. Lay the valve cover back into place before attempting to clear the cylinder of any residual oil or fuel......I do this by turning the engine over by hand a few revolutions, then jump in and hit the starter for about 10 seconds. Replace the glow plug and bolt everything back on. It will take about 10-15 second of cranking for the engine to start, and about another 20 miles of driving to clear all the air from the systems. 
|
|
#2
Sun, March 20th, 2011, 12:19 AM
|
||||
|
||||
|
While I was in there I re-routed the fuel lines to feed both heads from the rear, and added a crossover line to tie the front of the fuel rails together.
Sorry, no pics....was in a bit of a rush to get back on the road. But I did take the intake air heater out - cut it up - and soldier a fitting onto it so I have a easy boost reference point for when I add gauges.  My pod should be in next week and I will scrounge up some spare gauges to put in......then she's done for the summer.......hopefully. 
|
|
#3
Sun, March 20th, 2011, 01:47 AM
|
|||
|
|||
|
Nice write up!

__________________
2002 7.3 F250 Supercab Shortbox DIY intake CCV dumped Autometer gauges WW/ATS 1.0 exhaust housing Hutch/Harpoon in tank mods/hpX line AIH delete/ebpv delete TruCool trans cooler Straight piped PHP FU
|
|
#4
Sun, March 20th, 2011, 07:16 AM
|
||||
|
||||
|
Nice, I like it

__________________
|
|
#6
Tue, March 22nd, 2011, 08:34 PM
|
|||
|
|||
|
Quote:
 On edit, I think your are talking about different plugs for the fuel. You said a 1/4 inch drive so I'm guessing on the back of the head towards the firewall? Take it easy on the newbie..lol.. Last edited by tdpower; Tue, March 22nd, 2011 at 09:14 PM.
|
|
#7
Tue, March 22nd, 2011, 11:21 PM
|
||||
|
||||
|
Yip, it is the banjo bolt on the rear of the head that needs to be loosened, and not the plug on the intake manifold side.
You can see it easily in this picture, it is on the driver front in this picture(shiny round thing), but it is in the exact same location on the rear of the head. 
|
|
#8
Tue, March 22nd, 2011, 11:43 PM
|
|||
|
|||
|
Quote:
That looks sweet. I love the color scheme. Is that an engine you are building or put in? Thanks for the update, can't you pull the rear injectors on both sides then suck them out? I have never had to replace them just something I read. I should of replaced the harmonic balancer when I did the lpop. 
__________________
Grant -------------2000 7.3 powerstroke. PHP 6 position chip (stock,high idle,60tow,80dd,100hp,no start) autometer phantom gauges (pyro,boost, trans) 6637 filter, AIH delete. Oil crossover(died rest in peace). 6.0 tranny cooler, In tank mods, Wicked Wheel. Walker muffler, Riffraff FRX.
|
|
#9
Wed, March 23rd, 2011, 11:17 AM
|
||||
|
||||
|
That is the motor I put in my CCSB, which is currently in pieces now.
You could just not pull any plugs and let the cylinders fill with fuel and oil, then evacuate them later, but using this method there is no cross contamination between the two. This is the method Ford recommends, and frankly, I prefer it because there is not such a big mess when you are done.
|
|
|
|


 Linear Mode

